
Great news, your latest pitch was a huge success, and you’ve landed a new client!
After a quick celebration, you need a plan to onboard this client and get started working with them. There’s so much information about “landing the client”, but not much about what needs to happen once you’ve sealed the deal. As an agency founder or Head of Client Services, you need to be clear on:
- What are the next steps?
- How do you actually start working together?
- How do you keep the momentum going?
This blog covers the seven key steps in a new client onboarding social media questionnaire to help you get started.
If you're after a complete guide on onboarding new social media clients, check out our video with Agency Owner, Desiree Martinez, below! She will take you through setting expectations, contracts, service charges, her take on the client questionnaire, various other admin tasks, and more!
Let’s start with this handy social media questionnaire onboarding checklist summary table.
Onboarding Social Media Client Checklist Summary Table
|
Step |
Focus Area |
Key Activities |
Purpose |
|
Step 1 |
Client Onboarding Questionnaire |
43 questions covering: • Purpose & objectives • Target audience & platforms • Brand voice & messaging • Content strategy • Social platforms selection • Tools & analytics • Expectations & goals |
Understand client's business needs, goals, target audience, and expectations before starting work |
|
Step 2 |
Legal & Contractual |
• Send signed contracts • Sign NDAs • Collect tax information • Sign contractor agreements |
Formalise the business relationship and establish legal protection |
|
Step 3 |
Invoicing Processes |
• Invoice requirements (PO numbers, addresses) • Payment terms & timelines • Deposit collection • Extra costs policy • Send first invoice |
Align on financial expectations and prevent payment disputes or scope creep |
|
Step 4 |
Project Management Setup |
• Add client to CRM/tools • Assign team members • Create tool accounts • Set up file sharing • Assign initial tasks |
Integrate the client into your workflow and project management systems |
|
Step 5 |
Workflow Automation |
• Establish approval processes • Set communication channels • Define project timelines • Confirm social accounts access |
Create sustainable long-term working processes for client retention |
|
Step 6 |
Kick-off Call |
• Tech check & tool demos • Team introductions • Project review • Discuss next steps • Q&A session |
Ensure everyone understands the project scope and feels comfortable moving forward |
|
Step 7 |
Welcome Packet |
• Team details & contacts • Project summary & goals • Services breakdown • Timeline & milestones • Login information • Client expectations • Financial recap |
Provide a comprehensive reference document containing all onboarding information in one place |
Now, let’s go through everything in more detail.
Step 1: [FREE] Client onboarding social media questionnaire checklist

The first step includes a list of 43 questions you could include in your new client onboarding social media questionnaire.
This is a long list of questions. So, you might be wondering whether you need to include them all. Not at all. It’s better to ask them now than 3 months later.
Feel free to ask as many or as few of these questions as you need to get a clear picture of your client's business needs before you start working with them.
Whether that means you ask five questions, 10, or even all 43, you'll discover over time that the answers to some questions are more valuable to you. You can always tweak your questionnaire to suit your needs and your individual clients:
1. What questions should you ask in a social media questionnaire?
When you're running a social media marketing agency, client retention is key. That means keeping them happy by showing results. To achieve this balance, you need to understand your client's goals on social media; this is essential to crafting a strategy that works for them.
At the beginning stage of your relationship, these questions are designed to tease out their ideas about social media and how it fits into the overall marketing strategy for their business.
Try using these questions to delve into your client’s motivation and purpose:
- What is your purpose on social media?
- What is your brand’s objective?
- What do you hope to achieve using social media? What does success look like: How will you know you’ve achieved it?
- What’s the biggest barrier to your success on social media?
- How does social media fit into your growth plan?
The answers your client gives you will indicate how highly they value social media in their marketing plan and help you determine the results they are looking for.
2. Who are your client’s audience, and which social platforms are they on the most?
A company or brand that speaks in their audience's language wins on social media. It shows they truly know and understand their customers. If you’re speaking for them on social media, then it’s crucial that you really get the right tone of voice (ToV), and the only way to nail that is to get inside your client's head.
This checklist will help you achieve that. Even if they have clear, detailed brand, ToV, and messaging guidelines, you need to talk with them to ensure you understand them well enough to avoid mistakes at the post level.
Your client should be able to answer these questions about their target audience, which will help you decide how best to use social media content to target them:
- Describe your target audience. Who are they?
- What social platforms do they use?
- What issues matter to them?
- How does your brand engage them?
- What social listening have you done? What does your audience say about you?
- Who else (brands/celebrities/people) does your audience engage with?
The answers to these questions will tell you two things:
- How well does your client know their target audience?
- Who their target audience is (e.g., ideal customer profile (ICP)).
When you have the answers, you’ll be able to prepare content for campaigns that will resonate with your client’s target audience. Make sure to regularly refresh your understanding of this information as part of a social media health check to stay on track to reach your goals. And in the meantime, feel free to use our audit checklists:
- Instagram Audit Checklist
- LinkedIn Audit Checklist
- Facebook Audit Checklist
- X (Twitter) Audit Checklist
- Save time: Conduct a comprehensive, multi-channel social media audit.
3. How do you want your brand to sound and look like on social media?
One of the greatest challenges of taking on a new social media client is stepping into their brand and using their voice. The more your client can tell you about their brand, the easier it will be to create content that is true to their brand voice and resonates with their audience.
Here are some great questions to ask to learn more about your client’s brand:
- Describe your brand voice.
- What tone should social media updates have?
- What is the main message your brand is trying to communicate?
- What makes your brand different from others?
- Why do people choose you over your competitors?
- What’s your brand vision?
The answers to these questions will guide the content you create and the tone you use in response to audience engagement, user-generated content (UGC), and feedback or complaints.
When talking about this with your clients, make sure to underline the importance of creating a community. Make this an integral part of your social media strategy for every client (where appropriate, as it might not be suitable for every client).
Outlining a community management strategy that revolves around using a friendly approach, being there for the customers, and creating a safe place to discuss (and promote) the brand's offer has become an essential social media tactic.
4. What type of social media content should fill your calendar?
Social media is all about content. Finding out what content your client has used in the past, how they’ve used it, and the resources they’ve allocated to it will help you leverage what’s working and identify new opportunities to test in your campaigns.
Ask these questions in your social media client questionnaire to make sure you’ve got all the content information you need:
- What resources do you have available for content creation?
- What is your workflow process for content from inception to publication?
- What sign-offs do you require?
- How often do you want to publish new content to your profiles?
- How does social media tie in with your offline campaigns?
- What type of content does your audience respond to best (if known)?
- What type of content do you want to create for your audience (images, video, quotes, blog posts, etc.)?
- What message are you trying to send with your content?
- How do you use user-generated content in your campaigns?
- What holidays does your client want to observe?
Pro tip: Celebrating social media holidays on your client's social media channels can be a great way to increase their brand awareness and reach. Consider taking advantage of highly relevant ‘World Days’, for example, if your client sells hot dogs, World Hot Dog Day is in July, and it’d be remiss not to mark the occasion!

If you don’t already have a calendar to reference, our comprehensive social media holiday calendar is a great place to start.
Alternatively, you can access this content directly in Sendible's calendar!
The answers you get to these questions will help you determine the resources you have available to work with on your client’s content and opportunities for growth. It will also help you add the right type of content to your strategy, so that it’s aligned both with your client’s brand and the latest social media trends.
To ensure your client stays visible and remains relevant on social media, posting high-quality content tailored to what their audience wants is essential.

You see, social media platforms are oversaturated with all sorts of content, and the number of competitors gets bigger every day. Users' attention spans are decreasing, and recent studies indicate their needs have become more specific.
They value authenticity, personal touch, deeper connections, and above all, content that solves their problems.

The Top Social Media Trends That You Need To Pay Attention To
Wondering how often should you post on social media? As Jay Bayer said: The best social media publishing frequency is: when it's worthwhile. But we went a bit further down this rabbit hole.
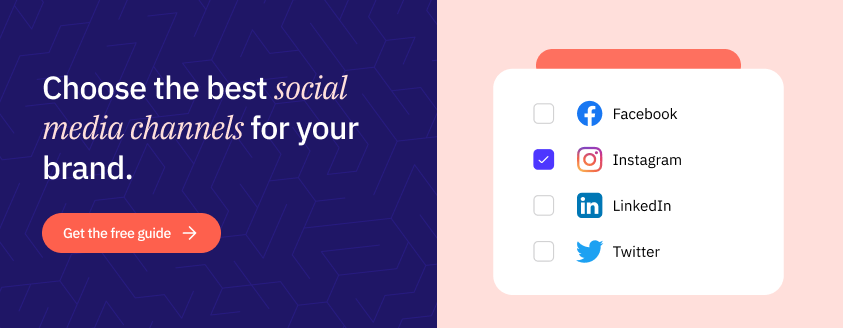
5. What social platforms do you want to be active on?
To craft your client’s strategy, you need to know what social media channels they plan on using. If they have dozens or hundreds of accounts, your fee will be higher because it will require more account management. Ask them which profiles they currently have, which they want to add, and whether they want to stop producing content for any platform.
Add these questions to your questionnaire:
- What profiles do you have and on which platforms?
- Are you looking to expand onto new social media platforms?
- Are you looking to narrow your focus to fewer social media channels?
- Do you want to provide customer service on social media? If so, on which platform and from which profile?
Not only will these answers tell you where you need to focus your efforts, but they'll also help you uncover new growth opportunities. Are they using TikTok or Instagram Reels?
If not, this would be a great way to introduce their potential and existing customers to what's happening behind the scenes. These channels are a great way to create long-lasting, personal bonds with followers and those who are yet to discover the brand.
One reason that TikTok and Instagram are already crucial in social media, especially for B2C/consumer brands, is that 1 in 3 consumers (and >50% of Gen Z) now start searches on TikTok/Instagram instead of Google (ALM Corp 2026 Guide). We expect that to increase, and the influence of X (formerly Twitter) is diminishing as we go into 2026.
6. What social media tools and analytics are you currently using?
Unless your client is new to social media marketing, chances are they’ll have used tools to help them and should have some data on their campaigns' effectiveness.
You’ll want to find out what tools they’ve been using, how they’ve measured ROI, what they’ve tried in the past, and what is and isn’t working for them.
Learning about their sales funnel and buyer’s journey also helps clarify where social media marketing fits within their overall marketing strategy and sales process.
These questions will help you get the answers you need:
- What tools have you used to manage your social media profiles until now?
- How do you intend to measure return on investment?
- What is working for you (and not working) right now?
- How does social media fit into your sales funnel or buyer’s journey?
- What have you tried in the past?
- Have you got any tracking pixels installed on your site?
Assessing data from previous campaigns will be invaluable to your efforts, as you’ll be able to use past campaigns as a guide that will help you form ideas to improve results in future and set measurable goals for social media campaigns. Furthermore, these valuable insights will help you manage expectations and make data-driven decisions. This brings us to the next point.
7. What are your expectations and goals from social media marketing?
Want to know the easiest way to find out what your client wants? Ask them!
We’ve all had demanding clients who don’t follow the unspoken rules of engagement… But could that relationship have been completely different with a simple discussion of expectations at the beginning?
Here are some questions that will help you open up communication with your client about their expectations:
- What do you expect from us as your account manager?
- What reports do you want to see and how often?
- Who is the person we should contact?
- How much oversight and control do you want to have?
- How much input do you want to have in campaigns?
A large part of managing client satisfaction comes from managing client expectations. Understanding what your clients expect helps ensure you deliver what they actually want.
If your client has expectations that are beyond what you’d consider reasonable, knowing that from the beginning enables you to discuss them and agree on the service you provide.
New 2026 bonus question: 43: Do you want to use AI in your social media content, or not?
Based on our experience and current industry trends and data, we recommend against using AI to generate social media posts. People, customers, and the target audience of your client don’t want to see AI-generated content. A recent survey found that 52% of users are concerned about undisclosed AI content.

Step 2: Legal and contractual social media client onboarding
Let’s get the boring but necessary stuff out of the way first.
This part of the client onboarding process occurs at the start and serves as the formal agreement between you and the client.
During this stage, you should consider:
- Sending a signed contract
- Sending and signing any necessary NDAs
- Collecting and gathering any relevant tax information
- Sending and signing contractor agreements
This is another great example of when a client onboarding checklist template would be useful.
Your template could include a basic legal contract or an NDA you can use for this step.
Step 3: Client invoicing processes and timescales
Ironing out the financial aspects of a project before it gets started reduces the risk of miscommunication, scope creep, and overspending.
You and the client must be aligned on costs and invoicing processes. The last thing you want is to expect payment on or around the end of the month, only to find out that a client expects 60-day terms. Make sure you’re aligned at the start.
This helps build a healthy client relationship over time and is part of a good client onboarding process.
 Source: @ashleyrcummings
Here are some of the things you can include at this stage of the onboarding process:
- What to include on invoices: including PO numbers, client addresses, and any mandatory tax information
- How does your invoicing process work? For example, you need to be 100% clear on:
- When will you send invoices?
- How long does the client have to pay?
- What is your preferred payment method?
- Costs: Is it a one-off cost or will you be working on a monthly retainer?
- Deposit: Whether a monthly retainer or one-off work, make sure to get a deposit before you start doing any work.
- Extra costs: what’s the fee for any extra work? What happens if there is scope creep and you need to charge more? How will you work that out and invoice for it?
- Send the first invoice: kick the payment process off by sending your first invoice (this usually seals the deal with the client, too)

Step 4: Highlight any important project management information
Setting up a new client in your project timeline is crucial to ensuring you meet all required deadlines and stay on track.
What you include at this stage of the onboarding process will be determined by your pre-existing project management process, but it should include tasks like:
- Adding the client to your CRM or any tools you use: add their contact details and any important information to accounting tools, communication tools, and planning tools.
- Assigning team members to the account: choose who you want to work on the project and add them to the necessary project planning tools (and check their schedules!). Make sure you are using a tool that allows you to assign tasks to different team members easily.
- Creating accounts for tools: set your new client up on any joint tools you use.
- Sharing file information: let the new client know how you’ll be sharing files and add them to the folder if necessary.
- Assign initial tasks: kick off the project by assigning the first few to your chosen team members.
Step 5: Implement automated social media workflow and project processes
Now that everything is set up and ready to go, you can start thinking about what working with this client will look like in the long run.
There’s often a lot of chat at the beginning while you iron things out, but how will you continue to communicate, and what will the project look like in action?
These points are key to client retention.
At this point, think about sharing information like:
- Approval processes: how will clients share their feedback? How often will you need client approval, and how will you manage it?
- Communication: Which communication channels will you use with the client? What about if there’s an emergency?
- Timelines: when will the project end? What will be the key milestones in between, and what tasks do you need to do at each milestone?
- Chosen accounts: what social media accounts will you be posting on for your client? Do you have access to them and understand the branding guidelines?

Step 6: Have a pre-launch social media strategy kick-off call
You will have already spoken to the client in detail about their wants and needs, but this is the time in the client onboarding process to discuss how things will look going forward.
Use this call to briefly review the key parts of your onboarding process and address any questions they may have before you officially get started.
Consider including these in your kick-off call:
- Tech check: make sure everyone understands what tools you’ll be using and is comfortable with them. Provide demos if necessary and answer any questions the client might have
- Introductions: give everyone on your team the chance to say hi and introduce themselves, before asking your new client to share a bit more information about them
- Project review: go over the project and discuss the end goal you’d all like to achieve. Ask the client what this might look like for them in reality and walk them through the steps you’re going to take to get them there
- What’s next: talk about the first couple of milestones and the tasks you’ll be doing to make sure everyone is on the same page about what happens next
- Question time: your client will probably have a question or two for you, so give them a dedicated space to ask
Step 7: Send a client welcome packet
A welcome packet can neatly contain all of the information you’ve gathered from the onboarding questionnaire and the other steps in this process.
This document includes all the relevant information a client needs in one place.
It also serves as a reference for you and your team to review the client’s expectations and the logistics you agreed on during onboarding.
Feel free to use a different medium here. In 2026, 69% of people say that they feel more video should be used in the onboarding process.
You should include information like:
- Team details: information about which team members the client will be working with, including their contact information and role
- Summary of project and goals: a quick overview of the project and the key goals you’ll be working towards (this will have been discussed in both the onboarding questionnaire and the kick-off call)
- Summary of your services: a breakdown of the services you’ll be providing and what they include
- Project timeline: the length of the project, as well as key milestones, and what needs to be completed at each of those milestones
- Log-in information: a list of the tools you’ll be using and any login information that clients might need
- Expectations of the client: when clients need to provide feedback, what information they need to provide, and any timelines for information they need to get to you
- Financial information: recap your invoicing process, costs, and your preferred payment method
How do you automate social media client onboarding? Use Sendible
Sendible offers a wide range of features that will make you fall in love with social media management again, including generating easy-to-understand social media reports.
And not just you, but your clients, too!
Sendible makes it even easier to onboard clients automatically, set-up a dashboard, and make it easy to work together.
So let's dive into a select few features that we know you'll love:
Onboard your clients securely with Client Connect
Client Connect helps you build trust from the start. This handy feature lets your new clients share social media credentials without making you an admin, and adds their social media profiles to your Sendible dashboard for added security.
Permission management via Content Library
Empower your clients or junior team members with access to your social media content creation. No need to worry about mishaps—introduce them to Content Library roles.
Create access tiers for users
Not every user needs to access all functionality. With our custom user permission groups, you can decide who gets access to what. For example, you might charge your clients more if they request additional profiles or custom reports.
Send approval requests in bulk
Save your and your client's valuable time by sending the approval requests in bulk. While Sendible allows you to assign tasks and send individual approval requests, our Bulk Importer enables you to send them an entire campaign or month's worth of content for approval at once.
Care to learn more about our agency-specific solutions, such as Share Button, Automated Reports, Campaign Management, and more? Then schedule a consultation with one of our experts or test Sendible for free for 14 days!
Agencies can use our solution white-label, so be sure to ask about white-label social media management.

Try Sendible free with 14-day free trial.
Leverage Sendible’s extensive integrations to create, schedule, publish, and engage with your posts seamlessly.

Text copied!