
Understanding the effectiveness of your social media campaigns is crucial for refining your strategy and proving ROI.
UTM parameters are an invaluable tool for tracking and measuring the impact of your social media efforts. By adding these simple snippets of code to your URLs, you can gain detailed insights into where your traffic is coming from, which campaigns drive engagement, and what content resonates most with your audience.
In this guide, we’ll explain how to use UTM parameters effectively, helping you demonstrate the success of your social media initiatives precisely.
- What are UTM tags?
- What are UTM links?
- How to shorten UTM links?
- Top tips for creating UTM parameters for social media
- How to create UTM tags for your social media campaigns
- How to use UTM links on social media platforms
- How to track UTM parameters in Google Analytics 4 (GA4)
- How can Sendible help you set up and track UTM links in one place?
- [Free] Social media campaign report template

What are UTM tags?
UTM tags (also known as UTM parameters) are small pieces of text added to the end of a URL to help track the effectiveness of online marketing campaigns. UTM stands for "Urchin Tracking Module," a tool developed by Urchin Software Corporation, which was later acquired by Google and became part of Google Analytics. UTM tags allow marketers to track specific details about where website traffic is coming from, such as the source, medium, campaign name, and even individual content pieces or keywords.
There are five standard UTM parameters:
- Campaign Source (utm source)(required*): Identifies the source of the traffic (e.g., Google, Facebook, newsletter).
- Campaign Medium (utm medium): Describes the marketing medium or channel used (e.g., email, social, PPC).
- Campaign Name (utm campaign): Names the specific campaign (e.g., spring_sale, product_launch).
- Campaign Term (utm term): (Optional) Tracks specific keywords in paid search campaigns.
- Campaign Content (utm content): (Optional) Distinguishes between different ads or links that point to the same URL, useful for A/B testing.
Note: *Campaign Source is the only parameter marked as required. However, to get any meaningful data, you should use Source, Medium, and Name .
As you enter values in each field, your campaign URL takes shape, and you end up with a UTM link.
What are UTM links?
UTM links are URLs with UTM tags appended to them.
They are used in marketing campaigns to direct users to specific landing pages while simultaneously capturing detailed information about the user's journey. When someone clicks on a UTM link, the parameters are sent back to your analytics platform, allowing you to see exactly how visitors are interacting with your content.
For example, a UTM link might look like this:
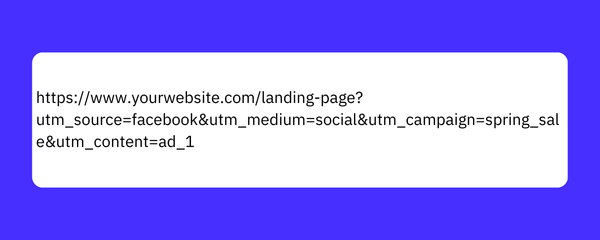
In this example:
- utm source=facebook indicates that the traffic came from Facebook.
- utm medium=social specifies that it was through social media.
- utm campaign=spring_sale tells you it was part of the Spring Sale campaign.
- utm content=ad_1 helps identify which specific ad drove the traffic.
Using UTM tags and links helps you better understand the effectiveness of your marketing efforts, allowing for more informed decision-making and optimization.
The downside - now that you've added UTM values - is the URL length.
How to shorten UTM links?

The Benefits of URL Shortener: Make Links More Clickable
UTM links can indeed become quite long and cumbersome, especially when you’re adding multiple parameters.
This length can be a drawback on social media platforms, where brevity is key and overly long links can look cluttered or unprofessional. Fortunately, there’s a simple solution that will also improve the performance of your digital marketing campaign: shortening your UTM links.
You can easily shorten UTM links using URL shorteners like Bitly or TinyURL. Or, if you prefer having everything in one place, you can do it directly in Sendible's Smart Compose Box. These tools take your long UTM link and condense it into a more manageable, concise URL.
Here’s how to do it:
- Create your UTM Link: Build your full UTM link using a URL builder or manually append the UTM parameters to your URL.
- Visit a URL shortening service: Go to a site like Bitly or TinyURL.
- Paste your UTM link: Copy your long UTM link and paste it into the URL shortening service.
- Get the shortened URL: The service will provide you with a shortened version of your UTM link, which you can now use in your social media posts.
There are numerous benefits to shortening UTM links for social media, such as:
- Cleaner appearance: Shortened links look more polished and are less likely to clutter your posts, making your content more visually appealing.
- More clickable: Users are more likely to click on shorter, cleaner links, as they look less intimidating and more trustworthy.
- Better for character limits: On platforms like X, where character count is limited, shortened links help you stay within the limit while still tracking important data.
- Easier sharing: Shorter links are easier for users to copy, paste, and share, helping to increase the reach of your content.
- Trackable analytics: Most URL shorteners also offer basic analytics, giving you another layer of insights into your link’s performance.
By shortening your UTM links, you can maintain the detailed tracking benefits of UTM parameters without sacrificing the neatness and professionalism of your social media posts.
Top tips for creating UTM parameters for social media
1. Be consistent with your UTM values
Google Analytics would record utm_source=twitter and utm_source=Twitter as two different sources. Most people recommend using lowercase, but whatever you decide, stick to it.
2. Use dashes, not underscores
Use dashes rather than underscores as separators in your values, as Google universally recognises dashes (-) and not underscores (_) as separators.
3. Keep values simple and direct
If you use too many words to describe your values, they can become unwieldy. For example, compare these two alternatives:
- utm_campaign=have_a_drop_down_menu_in_the_navigation_kill_it_with_fire
- utm_campaign=navigation-menu
The first is descriptive and long, while the second one is more succinct.
4. Use a link shortener
As mentioned above, once you've added UTM values to your URL, it can become somewhat lengthy. A link shortener helps to keep URLs tidy and manageable.
5. Track UTM tags
It's good practice to track your UTM values for all your campaigns in one central location.
How to create UTM tags for your social media campaigns
Now you know how to add UTM values, let's see how you can use them in your campaigns. Remember, the UTM values are going to help you understand more about your website traffic in Google Analytics. You want to know:
- Source - Where is the traffic coming from?
- Medium - How is the traffic coming to my website?
- Campaign - Why is the traffic coming to my website?
How to use the Source UTM value
Google recommends using the Source field to describe the 'referrer' or the platform that's sending the traffic. Don't be tempted to think of the referrer as the person sharing the link, because that will change, depending on who has posted the content.
Therefore, for social media, use the social platform in the source field:

Where's the traffic coming from? It comes from X (Twitter), Facebook, or Instagram.
How to use the Medium UTM value
For the Medium field, Google suggests using the general name of the marketing medium; e.g. email, web, blog, influencer. For social media, you can use the term 'social':

How is the traffic coming to my website? It's coming via social media.
How to use the Campaign UTM value
The Campaign field is more flexible than the others. Google recommends using it for specific product promotions or strategic campaigns. For example, we at Sendible might use the campaign name 'ai-assist-promo' when launching our AI Assist feature:

Why is the traffic coming to my website? It's coming via our new AI Assist campaign.
How to use the Content UTM value
The Content field is optional, but it can provide additional information if required. For instance, you might want to differentiate the types of posts on Facebook; e.g. a regular post versus a promoted post:
utm_content=promoted-post
Or you may want to specify the content format, e.g. Facebook video, Facebook image:
utm_content=video-post
How to use UTM links on social media platforms
Tracking the success of your social media efforts is essential for proving their value to your business.
While engagement metrics like likes and shares are important, UTM links take your tracking to the next level by allowing you to measure how social media directly contributes to business growth and ROI.
By attaching UTM parameters to your URLs, you can trace specific campaigns, posts, and even ad variations back to tangible outcomes, such as website visits, conversions, and sales.
This turns social media from a platform for fun memes into a powerful tool for driving and measuring business success.
Here’s how to effectively use UTM links on every prominent social media platform.

Feed posts: Instagram doesn’t allow clickable links directly in post captions. Instead, you can direct users to a link in your bio, which can be managed through tools like Linktree, lnk.bio, or Shorby. These tools consolidate multiple links into one bio link, where you can add UTM-tagged URLs to track specific campaigns.
- Best Practice: Regularly update the link in your bio to reflect the most current campaign. Use UTM links within your bio tools to track clicks and measure the effectiveness of your Instagram posts.
Reels: Similar to posts, Reels don’t support clickable links within captions. For any actions you want users to take, direct them to the link in your bio.
- Best Practice: Mention the link in your bio within the Reel’s caption or even in the video itself, encouraging users to visit your bio for more information.
Stories: Instagram Stories allow you to add a clickable link using the link sticker feature. Here, you can place UTM links directly, enabling precise tracking.
- Best Practice: Use a clear call-to-action with your link sticker, such as "Read the full article" or "Tap here to shop." This drives traffic while allowing you to track engagement and conversions through your UTM links.
Profile: Instagram only allows one clickable link in your profile bio. This is a perfect spot to include a UTM link, especially if you’re running a specific campaign.
- Best Practice: Use a link-in-bio tool to manage multiple UTM links under one profile link. Update your UTM link regularly to reflect your most current campaign or product, and use UTM parameters to track which bio links drive the most traffic.

A Step-by-Step Guide on How to Create a Business Facebook Page.
Posts: Facebook supports clickable links in both posts and ads, making it easy to use UTM links for tracking purposes.
- Best Practice: Place UTM links early in your post or ad copy, as links that are buried deep may receive less attention. Make sure the copy around the link clearly explains what the user will get by clicking it.
Profile/Page: Facebook profiles and business pages offer several places to include clickable links, such as in the "About" section or the main bio.
- Best Practice: Place your primary UTM link in the "Website" field of your Facebook page’s "About" section. You can also use UTM links in the bio or other sections that allow URLs. Regularly update these links if you’re promoting different campaigns or offers.
Facebook Groups: While Facebook Groups don’t allow you to place a link directly in the group’s profile, there are still strategic ways to incorporate UTM links within the group’s content.
Group Description: While you can’t place a clickable link in the group’s description, you can include a UTM link here for users to copy and paste if they’re interested in more information or related resources.
- Best Practice: Keep the link short by using a URL shortener, and clearly explain what users will gain by visiting the link. For instance, if you’re promoting a special offer or event, mention it directly in the group description with the shortened UTM link.
Pinned Posts: A pinned post is a great place to highlight important information, including UTM links. These posts stay at the top of the group’s feed, ensuring all members see them.
- Best Practice: Create a pinned post with a UTM link that directs members to your website, blog, or a special campaign landing page. For example, if you’re launching a new product, you can use the pinned post to share details and include a UTM link to track interest and engagement from your group members.
Regular Posts and Announcements: You can share UTM links in your regular posts or group announcements, which can be an effective way to drive traffic to specific pages or offers.
- Best Practice: When sharing content in the group, use UTM links to track which posts are most effective at driving traffic. Be sure to explain the link's value in your post, encouraging group members to click through.

Stand Out on LinkedIn: Lessons from the Best Profiles and Company Pages.
Posts: LinkedIn is ideal for B2B marketing, and you can place UTM links in both posts and ads to track business-related engagements and conversions.
- Best Practice: Since LinkedIn users are often looking for professional content, ensure your UTM links are associated with value-driven offers, like white papers or webinars, and place the link prominently in your first comment.
Profile: LinkedIn allows you to include a website link in your profile’s "Contact Info" section, which is ideal for driving professional traffic.
- Best Practice: Use a UTM link in your LinkedIn profile’s website field to track clicks from LinkedIn users visiting your site. If you’re running a specific campaign, consider updating this link to reflect the promotion, and use UTM tags to measure the success of LinkedIn traffic.
Page: LinkedIn Pages are essential for businesses looking to engage with a professional audience. They offer several areas where you can incorporate UTM links to track traffic and measure the effectiveness of your LinkedIn marketing efforts.
About Section: The "About" section on your LinkedIn Page is where you describe your company. You can include a clickable link here to your website or a specific landing page.
- Best Practice: Use a UTM-tagged link in the "Website" field of your LinkedIn Page’s "About" section. This link can be used to track traffic from LinkedIn users to your site. Update the link if you’re running a specific campaign to measure how much traffic the campaign drives from LinkedIn.
Call-to-Action (CTA) Button: LinkedIn Pages allow you to add a CTA button, which can link to your website, a contact form, or other relevant pages.
- Best Practice: Set up the CTA button with a UTM link that directs users to a campaign-specific landing page. For example, if your CTA is "Learn More" or "Contact Us," you can use a UTM link to track how many users are following through and measure the conversions or leads generated.
LinkedIn Page Posts: You can also include UTM links in the content you share via posts on your LinkedIn Page. These posts can promote blog articles, product launches, webinars, and more.
- Best Practice: Include UTM links in your posts to track engagement and traffic driven by specific content. Position the UTM link early in the post or in the first comment to ensure it is seen and clicked by your audience.
Showcase Pages: If your business uses LinkedIn Showcase Pages to highlight specific products, services, or sub-brands, you can include UTM links in the "About" section and posts.
- Best Practice: Just like with your main LinkedIn Page, use UTM links in the Showcase Page "About" section and CTA button. Additionally, track the performance of posts that promote specific products or services by using UTM links.
TikTok

TikTok, like Instagram, doesn’t allow clickable links in video captions, but you can direct users to your bio link. Using tools like Linktree in your bio enables you to track user actions through UTM links.
- Best Practice: Leverage the high engagement rates on TikTok by using compelling CTAs in your videos that guide users to click on the bio link.
X (formerly Twitter)
Your X (formerly Twitter) profile is a key touchpoint for engaging with followers and driving traffic to your website or specific campaigns. Incorporating UTM links into your X profile and Tweets allows you to track the effectiveness of this engagement and better understand how your Twitter presence contributes to your overall marketing goals.

Bio Section: The bio section of your X profile is one of the most visible parts of your profile and supports a single clickable link. This link is ideal for driving traffic to your website, a specific landing page, or a current campaign.
- Best Practice: Use a UTM-tagged link in your bio to track clicks from your X profile. If you’re promoting a specific campaign, update the bio link with a UTM link that reflects the campaign. You can also use URL shorteners to keep the link clean and concise.
Pinned Tweet: A pinned tweet stays at the top of your profile, making it an excellent spot to place a UTM link for a current promotion or important content.
- Best Practice: Craft a pinned tweet that includes a UTM link directing followers to a specific landing page, campaign, or content piece. This allows you to measure how much traffic this prominently placed tweet is driving to your site. Ensure the call-to-action in your pinned tweet is clear and compelling.
Profile Website Link: X allows you to add a website link separate from your bio. This link can direct users to your main website or a specific campaign.
- Best Practice: Use this space to add a UTM link that drives traffic to a key landing page. This is particularly useful for tracking how many users click through from your profile to learn more about your brand or offerings.
Regular Tweets: You can also include UTM links in regular tweets, whether you’re sharing a blog post, promoting a product, or announcing a special offer.
- Best Practice: Use UTM links in tweets to track which specific posts are driving traffic and conversions. Be sure to position the link within the first few lines of the tweet to maximise visibility, and consider using a URL shortener to keep the tweet visually appealing.
How to track UTM parameters in Google Analytics 4 (GA4)
In Google Analytics 4 (GA4), tracking UTM parameters allows you to analyse the effectiveness of your marketing campaigns. Here’s how to find and use this data:
Access UTM data in GA4
To view UTM information:
- Go to Reports > Acquisition > Traffic Acquisition.
- In the table, use the Session source/medium or Session campaign to see traffic categorised by UTM parameters.
These dimensions answer the critical questions of where, how, and why your traffic is coming to your site.
Proving ROI in GA4
To prove your social media ROI, set up Conversions (replacing Goals from Universal Analytics):
- Create a Conversion Event in GA4 based on specific user actions, like visiting a thank-you page after a form submission.
- Navigate to Configure > Events, then create a new event for your desired action.
- Mark this event as a Conversion by toggling the switch next to it.
This helps you track how your campaigns drive business outcomes.
Setting up dashboard reports in GA 4
To simplify tracking and reporting:
- Go to Explore > Blank to create a custom exploration.
- Add UTM parameters as dimensions and your Conversion events as metrics.
- Create a report that showcases your campaigns' performance, including conversions and traffic sources.
This allows you to monitor your social media campaigns' impact at a glance, making reporting easier and more effective.
How can Sendible help you set up and track UTM links in one place?
Effortlessly create UTM links: With Sendible, you can streamline your social media management by creating UTM links directly from our Smart Compose Box. This feature allows you to add UTM parameters on the spot, ensuring your links are trackable and ready for analysis. For added convenience, you can also create UTM parameter templates, saving you time and ensuring consistency across your campaigns.
Note: This feature is available for Scale, Advanced, and Enterprise plans.
Link shortening for cleaner posts: In the Sendible Compose Box, you can automatically shorten your links, making them more visually appealing and easier to share. Shortened links not only improve the look of your posts but also encourage more clicks by making the content more accessible and engaging.

Integrated Google Analytics reporting: Sendible’s Reporting Hub integrates seamlessly with Google Analytics, allowing you to generate detailed reports that include UTM parameters. This integration provides you with a comprehensive view of your social media performance, helping you track ROI and make data-driven decisions with ease.
Campaign reporting: Even if you don't use UTM links, Sendible helps you get comprehensive insights with campaign-level analytics and track the performance of your entire campaign instead of just individual posts. You’ll be able to understand what works and what doesn’t so you can adjust your strategy and maximise your impact.
[Free] Social media campaign report template
Here's how to use this template:
- Fill in the overview: Start by completing the campaign overview section to provide context for the report.
- Input data: Gather data from your social media platforms and analytics tools, and input it into the performance metrics and content performance tables.
- Analyse results: Reflect on the data, and complete the audience insights, ROI analysis, and lessons learned sections.
- Make recommendations: Based on your analysis, suggest improvements for future campaigns.
- Customise as needed: Add or remove sections based on your specific campaign and reporting needs.
1. Campaign Overview
- Campaign Name:
- Campaign Duration:
- Platforms Used:
- Campaign Objective(s): (e.g., brand awareness, lead generation, sales)
- Target Audience: (e.g., demographic details, interests)
- Campaign Summary: (Brief description of the campaign strategy and goals)
2. Key Performance Indicators (KPIs)
- Objective 1: (e.g., Increase brand awareness)
- KPI: (e.g., Reach, Impressions)
- Objective 2: (e.g., Drive website traffic)
- KPI: (e.g., Click-Through Rate, Website Visits)
- Objective 3: (e.g., Boost sales)
- KPI: (e.g., Conversion Rate, Sales Volume)

3. Performance Metrics
| Metric | Platform 1 (e.g., Facebook) | Platform 2 (e.g., Instagram) | Platform 3 (e.g., Twitter) |
|---|---|---|---|
| Impressions | |||
| Reach | |||
| Engagements | |||
| Clicks | |||
| Conversions | |||
| Follower Growth |
4. Audience Insights
- Top Demographics:
- Age Range:
- Gender:
- Location:
- Audience Behaviour: (e.g., engagement patterns, content preferences)
- New vs. Returning Users: (If applicable)
5. Content Performance
| Content Type | Top-Performing Post | Engagement | Clicks | Conversions |
|---|---|---|---|---|
| Image Posts | ||||
| Video Posts | ||||
| Stories/Reels | ||||
| Ads |
6. ROI Analysis
- Total Campaign Spend: £
- Revenue Generated: £
- ROI: (Revenue / Total Spend) x 100 = %
- Cost Per Acquisition (CPA): £
- Key Takeaways: (Summarise the financial performance of the campaign)
7. Lessons Learned
- What Worked Well: (List specific tactics or content that performed well)
- Challenges Faced: (Highlight any issues encountered during the campaign)
- Unexpected Results: (Mention any surprising outcomes, positive or negative)
8. Recommendations for Future Campaigns
- Content Suggestions: (e.g., focus more on video content, use different imagery)
- Targeting Adjustments: (e.g., refine audience targeting, explore new demographics)
- Platform Strategy: (e.g., invest more in a specific platform, try new ad formats)
- Budget Allocation: (e.g., reallocate budget based on performance)
9. Appendices (Optional)
- Detailed Metrics: (Include any additional data or graphs not covered in the main sections)
- Screenshots/Examples: (Attach images of top-performing posts or ads)
- Survey/Feedback Results: (If you conducted any surveys or gathered feedback related to the campaign)

Try Sendible free with 14-day free trial.
Leverage Sendible’s extensive integrations to create, schedule, publish, and engage with your posts seamlessly.

Text copied!